

n8n
There are two ways to use Zandovi in n8n:
- The MCP Client Tool, from an n8n AI Agent. The agent connects to Zandovi’s remote MCP server and calls its tools. It needs no node and works today.
- The Zandovi community node, for regular workflows. It renders a template with one input field per template variable, uploads images and runs batch jobs.
Use Zandovi from an n8n AI Agent (MCP)
Section titled “Use Zandovi from an n8n AI Agent (MCP)”n8n 1.119 added OAuth2 with dynamic client registration to the MCP Client Tool, so an AI Agent can connect to Zandovi’s MCP server the same way Claude and ChatGPT do. Add an MCP Client Tool to your AI Agent and set:
| Setting | Value |
|---|---|
| Endpoint | https://mcp.zandovi.com/mcp |
| Server Transport | HTTP Streamable |
| Authentication | MCP OAuth2 |
| Credential | An MCP OAuth2 credential with automatic client registration |
When you connect the credential, n8n registers itself with Zandovi and sends you to Zandovi’s consent page, where you pick the organization to connect and the scopes to allow. The agent then lists Zandovi’s tools and can render images, for example from a library starter with generate_image. You can review or revoke the connection in Zandovi under Settings → Connected apps.
Things to know:
- The agent receives links, not binary images. Rendered images come back as share links, so nothing is added to the n8n binary data of the workflow.
- Each call is charged like an API call. Renders made through the MCP Client Tool use your organization’s API render quota, exactly as a direct API call or an API key does.
When to use the node instead
Section titled “When to use the node instead”Use the Zandovi community node rather than the MCP Client Tool when you are building a regular workflow rather than an agent: it has per-variable fields for each template, returns images as binary files that later nodes can attach or upload, and runs batch jobs from many items.
Connect your account
Section titled “Connect your account”The node signs in to Zandovi with an API key. In Zandovi, open Settings → API Keys, create a key and give it the scopes for the operations you will use:
templates:readandrenderare the minimum for rendering:templates:readalone covers Template → Get and Get Many, and Generate needs both.- Add
templates:writefor Template → Create From Library. - Add
images:readfor Image → Get Many andimages:writefor Image → Upload. - Batch Job → Submit needs
renderandtemplates:read; the other Batch Job operations needrender.
In n8n, create a Zandovi API credential:
| Field | Value |
|---|---|
| API Key | The key you created. n8n stores it encrypted and the node never puts it in output data or error messages. |
| Base URL | Leave the default, https://app.zandovi.com. Trailing slashes and a trailing /api/v1 are ignored, so pasting the API root works, and every request goes to <Base URL>/api/v1/.... It must be an https:// address without a user name, password, query or fragment; plain http:// is accepted only for localhost during local development. |
The node never follows a redirect, so your key is only ever sent to the Base URL; a Base URL that redirects fails with “Zandovi answered with a redirect, which the node does not follow; check the Base URL of the credential”.
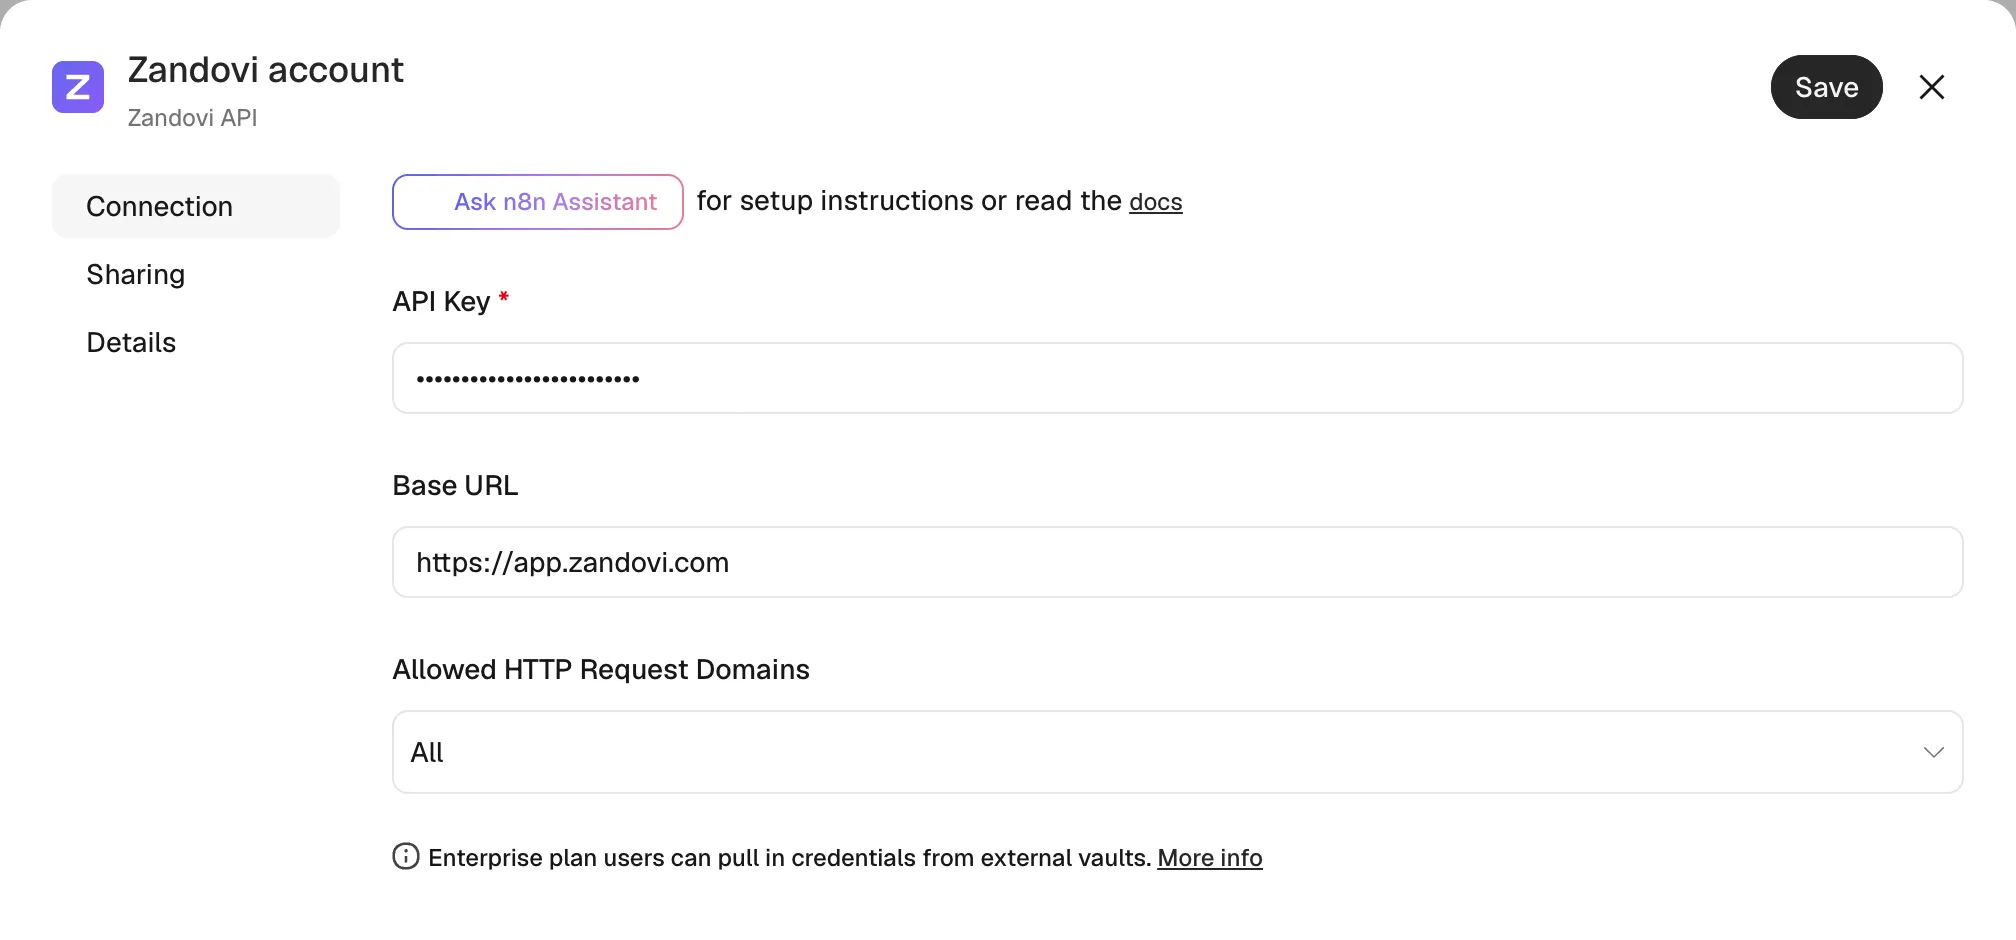
When you save the credential, n8n tests it with GET /api/v1/account. That call needs no scope beyond account:read, which every key has, so the test passes for any valid key; an operation whose scope the key lacks fails later with a message that names the missing scope. A revoked or mistyped key fails the test with “Invalid or revoked API key. Create one under Settings → API Keys.”
Install the node
Section titled “Install the node”n8n Cloud. Open the nodes panel and pick Zandovi under “More from the community”. Only an instance owner or admin can install community nodes, and the node is listed there once n8n has verified it.
Self-hosted. Go to Settings → Community nodes → Install and enter @zandovi/n8n-nodes-zandovi.
Render a template
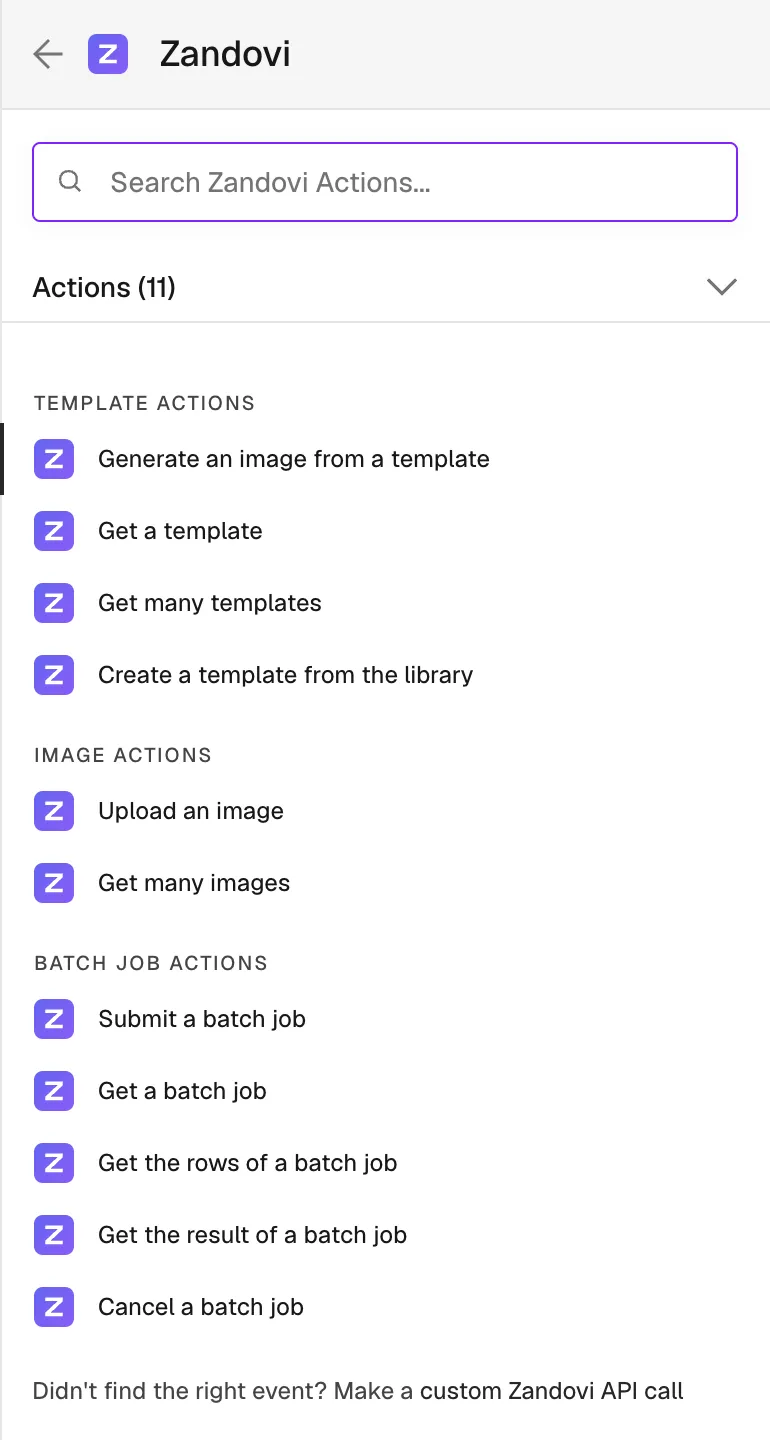
Section titled “Render a template”Add a Zandovi node and choose Template → Generate. It renders one image per input item.
Pick the template. In From List mode, choose a Project, then the Template from that project; the search box filters templates by name. In By ID mode, paste the template ID (a UUID) or map it with an expression. Anything that is not a UUID fails with “Enter a template ID (UUID)”.
The project list shows the projects your API key can see: your own projects and the projects other members of your organization have shared. Projects another member keeps private are not listed and their templates are not visible to your key, so a member who has no projects of their own and none shared by others sees an empty list. That is expected.
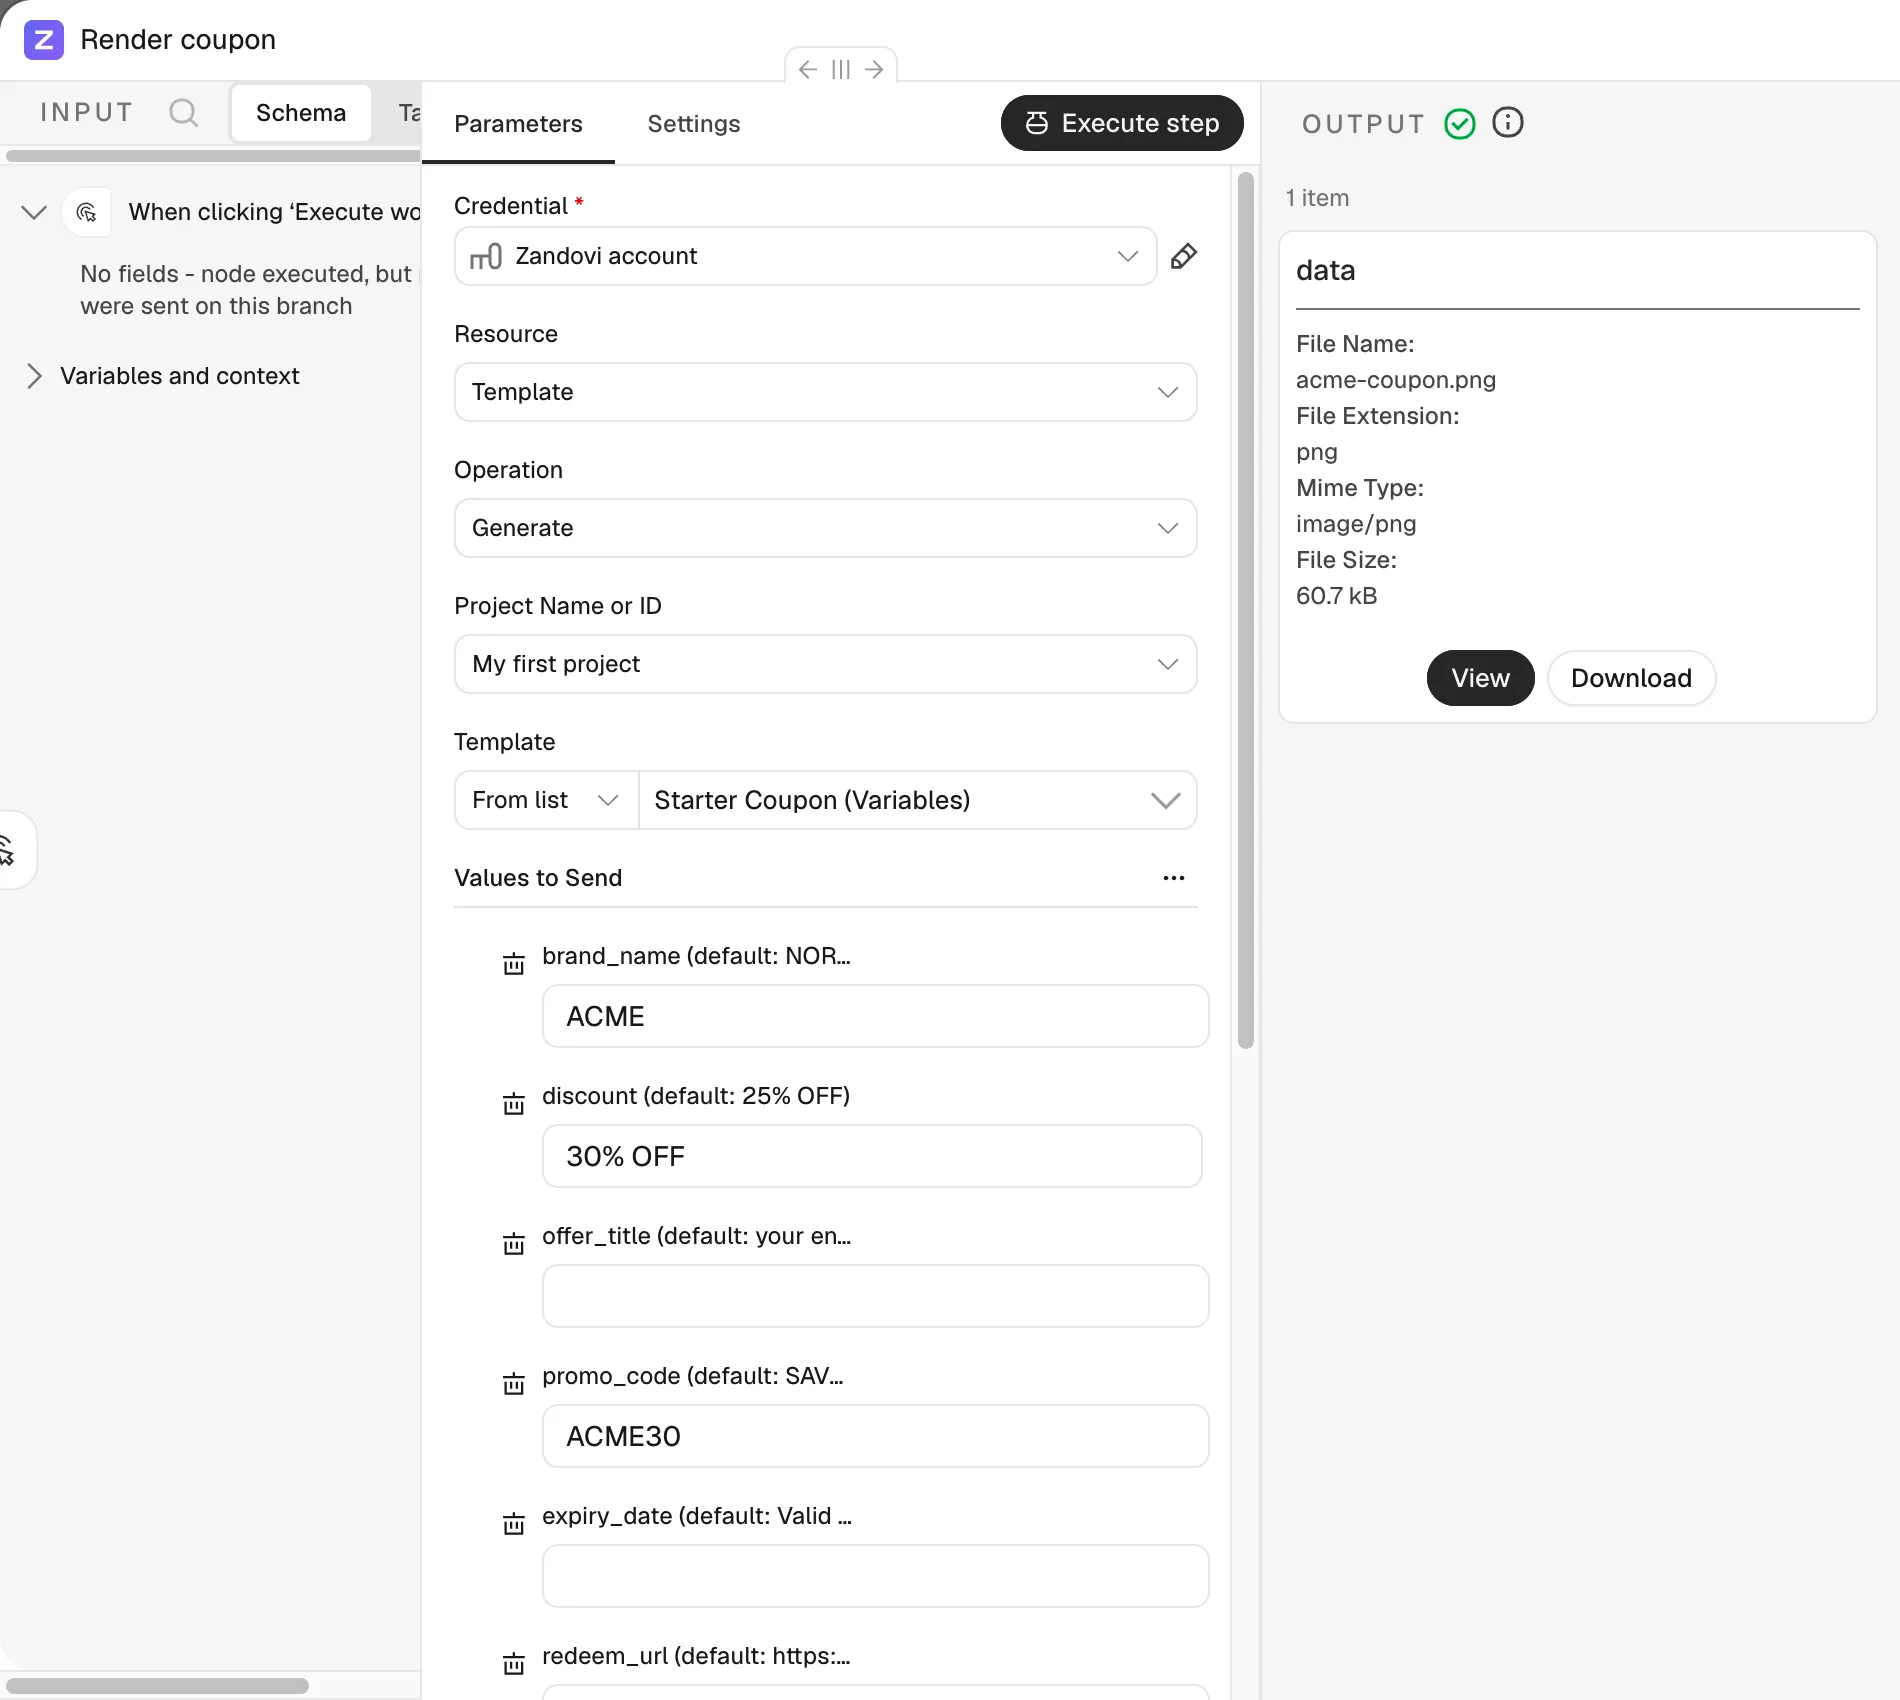
Fill in the variables. Once a template is chosen, Values to Send shows one field per template variable, labelled with the variable’s label (or its name when it has none) followed by the template’s default value, for example Recipient Name (default: Ana Silva); a long default is shortened with an ellipsis. A field is marked required only when the variable is required and has no default value; a required variable that has a default can be left empty, and the default renders. Number variables get a number field, variables with a fixed list of values get a dropdown, and every other variable gets a text field:
- Image variables take a public
https://URL, or thezandovi://images/{id}reference from Image → Upload. A private link, such as a Google Drive link, fails; upload the image first. - QR code and barcode variables take the value the code encodes.
- Date variables take a date written
YYYY-MM-DD, such as2026-12-24. Zandovi refuses any other form and prints the value as given. - Email, URL and phone variables must hold a valid value of their kind, and a variable with validation rules (a length, a pattern, a number range or a fixed list of values) must meet them. A value that breaks a rule fails with Zandovi’s message listing each broken rule, for example “Variable validation failed; amount: Must not exceed 99.0; code: Does not match required pattern”.
Fields are not pre-filled. A field you leave empty is not sent, so the template’s default value renders. A required variable with no value and no template default fails with Zandovi’s message naming it. Every value is sent as text: numbers as written (2, 19.9) and booleans as true or false. After you change the template’s variables in Zandovi, choose Refresh Variable List in the ⋯ menu next to Values to Send to reload them. A value mapped to a variable the template no longer has is still sent, and the output lists it under unknownVariables.
Choose the output.
| Delivery | What the output item holds |
|---|---|
| Binary File (default) | The rendered file in the binary field set by Put Output File in Field (default data), ready for an email, Drive or Slack node. The JSON holds templateId, fileName, mimeType, fileSize (bytes), format, unknownVariables, idempotencyReplayed and quotaRemaining. |
| Share Link | No binary. The JSON is the share link (url, expiresAt, fileName and the rest of the API’s response) plus templateId, unknownVariables, idempotencyReplayed and quotaRemaining. |
Format is PNG (default), JPEG, WebP or PDF. Options:
| Option | What it does |
|---|---|
| File Name | The name of the rendered file. Zandovi adds the format’s extension; without it, the name is the template name plus a short random suffix. |
| Output DPI | Screen (96), Draft (150) or Print (300). Use either this or Scale, not both. |
| Scale | 1 to 4 times the design size. |
| Quality | 1 to 100, for JPEG and WebP. |
| Background Color | Replaces the design’s background with a solid colour. |
| Link Expiry (Days) | How long a share link stays live, up to your plan’s limit. Share Link only. |
| Idempotency Key | Your own key for the request (see below). |
Retries are not charged twice, with one AI Agent exception. Every render sends an Idempotency-Key that the node derives from the workflow, the execution, the node name, the node’s run ($runIndex) and the item. When n8n’s Retry On Fail retries a render whose response was lost, for example after a timeout, the retry belongs to the same run, so Zandovi recognises the key and does not charge again: a binary file is rendered again for free (idempotencyReplayed: true) and a share link comes back as the same URL. That holds for a Zandovi node in the workflow itself; for Generate used as an AI Agent tool it depends on the Agent version: in older AI Agent versions (2.x) a retried tool call can get a new run index, so it gets a new key and renders again and is charged again. Each pass of a Loop Over Items loop and each AI Agent tool call is a new run of the node, so it is a separate render and is charged. Re-running an execution gives it a new execution ID, so it renders and is charged again. Set the Idempotency Key option to use your own key instead; it must be at most 255 visible ASCII characters, and reusing it with different inputs fails with “This Idempotency Key was already used with different inputs”. With several input items, give it an expression that differs per item, such as {{ $json.id }}: when items that render different content would share one key, the node fails those items before rendering any of them.
Template → Get reads one template, picked the same way, and outputs its details, including its variables. Template → Get Many lists the templates in a project, one output item per template, up to Limit (default 50) or all of them with Return All.
Get and Get Many need an API key with the templates:read scope, Generate needs templates:read and render, and Create From Library needs templates:write.
Start from a library template
Section titled “Start from a library template”Template → Create From Library copies one of seven starter templates that have variables into your account: Starter Coupon, Starter Gift Card, Starter Event Ticket, Starter Certificate, Starter OG Image, Product Spotlight and Guest Spotlight. Choose it from the Library Template list, and optionally a Project. The first entry of the Project list, Default (Your Oldest Project), is the default: the copy goes to your oldest project, or to a new “My first project” when you have none. The Project list shows every project your key can see, but the copy can only go into one of your own projects: a project shared with you by another member is refused with a 403, and the node says so.
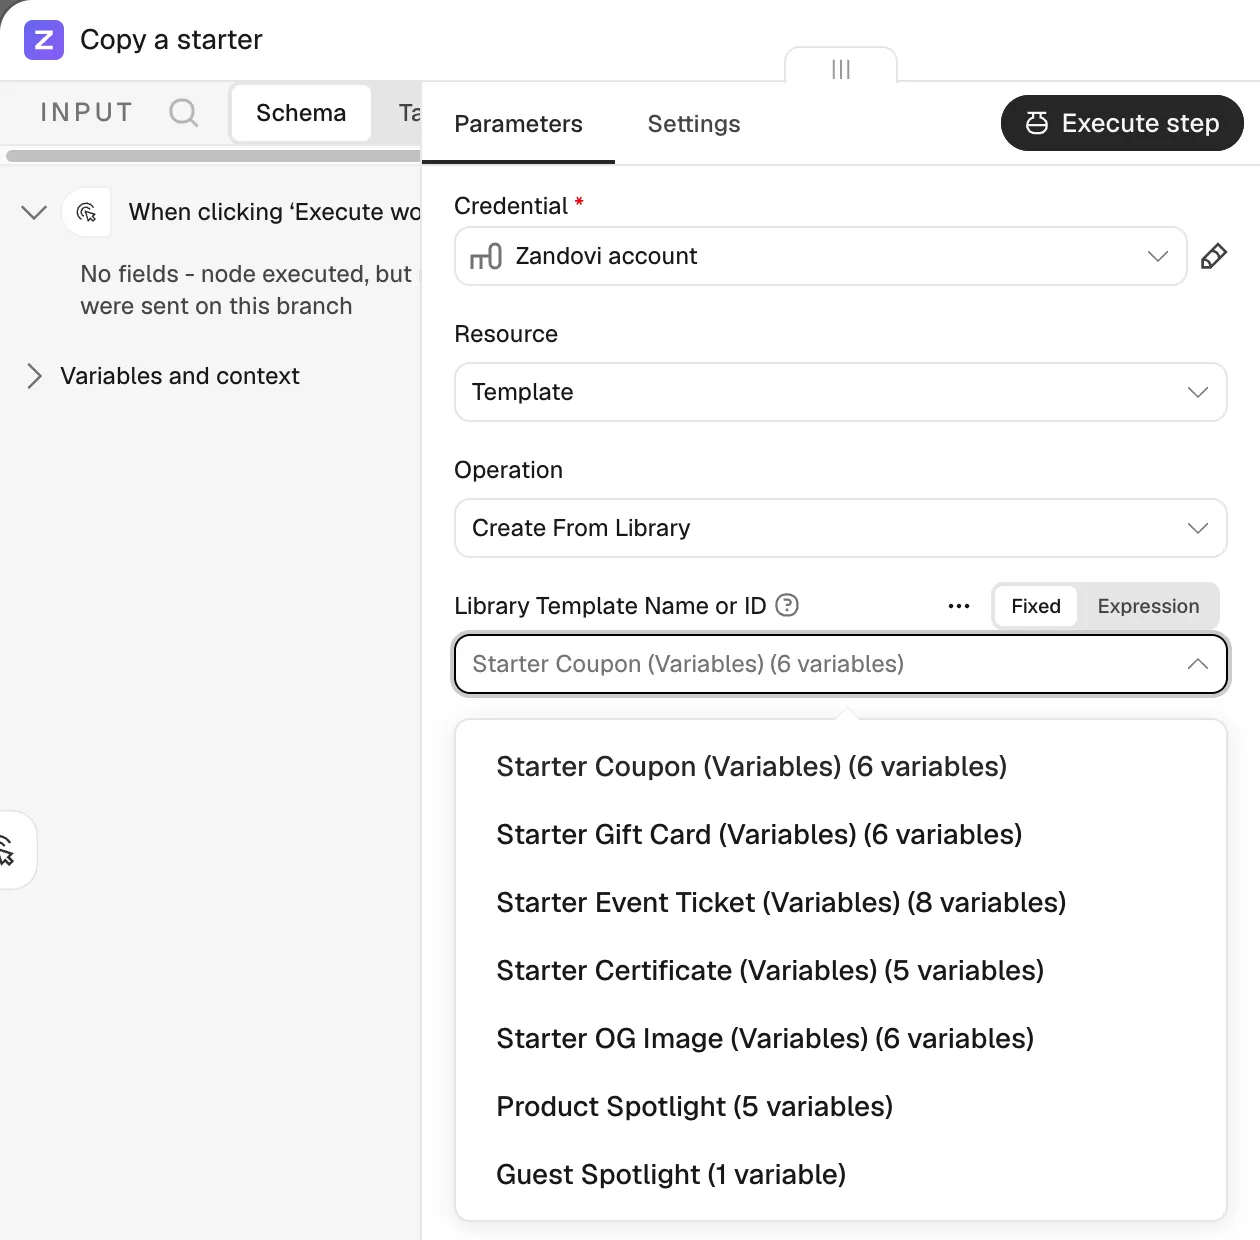
Reuse Existing Copy is on by default: if you already have a copy, the node returns it instead of creating another, so a workflow that runs on every execution does not fill your template limit. The output is the template plus reused (true for the existing copy, false for a new one). If you delete the copy, the next run creates a new one with a new id, so map the template id from this node’s output rather than hard-coding it.
Use your own images
Section titled “Use your own images”Image → Upload adds a picture to your Zandovi library. Choose a Source:
- Binary File (default) reads the file from the input item’s binary field, named by Input Binary Field (default
data). Use it after a node that downloads or receives a file, such as HTTP Request, Google Drive or a webhook. - URL sends an image address and Zandovi fetches it.
Under Options, Name sets the image’s name, and Visibility is Private (default) or Shared with your team.
Each uploaded file must be a JPEG, PNG, GIF or WebP image of at most 5 MB. The node checks this before sending anything, so an oversized or unsupported file fails at once with a clear message. Uploading the same URL twice returns the existing image rather than a copy; reused is true when the existing image was returned. Uploading a binary file always creates a new image, so upload each file once and reuse its reference. A file whose type is missing or generic (application/octet-stream) is typed from its file name extension.
The output is the image as Zandovi describes it, plus a reference such as zandovi://images/3f2a…. Map that value into the image variable of Template → Generate or Batch Job → Submit, and the render uses your picture.
Image → Get Many lists the images in your library, one output item per image, each with its reference. Use Search to filter by name, Limit (default 50) to cap the count, or Return All.
Upload needs an API key with the images:write scope, and Get Many needs images:read. Upload is limited to 30 files per minute; the node waits and retries when it is told to slow down.
Batch jobs
Section titled “Batch jobs”Batch Job → Submit renders one template for many rows in a single Zandovi batch job. It takes all the node’s input items at once: each item becomes one row of the job, built from the Variables fields the same way Generate builds them (every value as text, empty fields left out so the template default renders). The node outputs one item for the whole job, paired to every input item. Pick the Template and Format as for Generate. Under Options:
| Option | What it does |
|---|---|
| File Name Pattern | Names the files in the result archive. Use {variable} for any variable of the row, such as {name}, plus {index} (the row number, zero-padded to three digits), {timestamp} and {random} (six characters), for example {name}-{index}. Leave out the extension. Without a pattern the files are image-000, image-001 and so on. |
| Output DPI or Scale | As for Generate; use one, not both. |
| Callback URL | Where Zandovi POSTs when the job finishes (see below). |
| Idempotency Key | Your own key; by default the node derives one from the workflow, the execution, the node and its run, so a Retry On Fail retry returns the same job and is charged once (except for Submit used as an AI Agent tool in older AI Agent versions (2.x), where a retried tool call can get a new run index, so it submits again and is charged for a new job), while each pass of a Loop Over Items loop or each AI Agent tool call submits, and is charged for, a new job. Re-running an execution submits and charges a new job. |
Rows are checked before the job exists. Zandovi validates every row when you submit: one invalid row rejects the whole job, nothing is charged, and the message names the row (counted from 1, like n8n’s items) and each broken rule, for example “Variable validation failed; row 2, code: Does not match required pattern”.
Plan row caps. Each plan caps the rows in one batch job. Before submitting, the node reads your account and, when there are more input items than your plan allows, fails without submitting or charging anything: ”
Wait for Completion is on by default: the node checks the job every 5 seconds and outputs its final state once it has finished. A completed job is output even when some of its rows failed (see failedItems, or list the rows with Batch Job → Get Items), and so is a cancelled job. A failed job fails the node with “Batch job jobId, status) straight away.
Wait for the callback instead. Set Submit’s Callback URL to {{ $execution.resumeUrl }} with Wait for Completion off, then add a Wait node set to On Webhook Call with the POST method, then an IF node that checks {{ $json.body.status }} is equal to COMPLETED, and on its true branch Batch Job → Get Result with Job ID {{ $json.body.jobId }}, followed by an HTTP Request node that downloads the archive (see Get the result below). A job that ended FAILED or CANCELLED has no result, so handle it on the false branch. The execution pauses at the Wait node until Zandovi reports that the job has finished. The Callback URL must be a publicly reachable https:// address: Zandovi refuses anything else, so a self-hosted n8n on http://localhost:5678 cannot use this pattern until its public webhook URL is https and reachable from the internet. A repeated callback after the Wait node has resumed does not run the workflow again.
Get the result. Batch Job → Get Result returns { url, expiresAt }, a signed link to the ZIP archive of the rendered images. The link expires after about an hour, so call Get Result again for a fresh link rather than storing it. The node does not download the archive itself, because the archive of a large job can exceed n8n’s memory. To fetch it, add an HTTP Request node:
| Setting | Value |
|---|---|
| Method | GET |
| URL | {{ $json.url }} |
| Authentication | None. The link is already signed, so the Zandovi credential is not needed. |
| Options → Response → Response Format | File. n8n streams the download into its binary storage. |

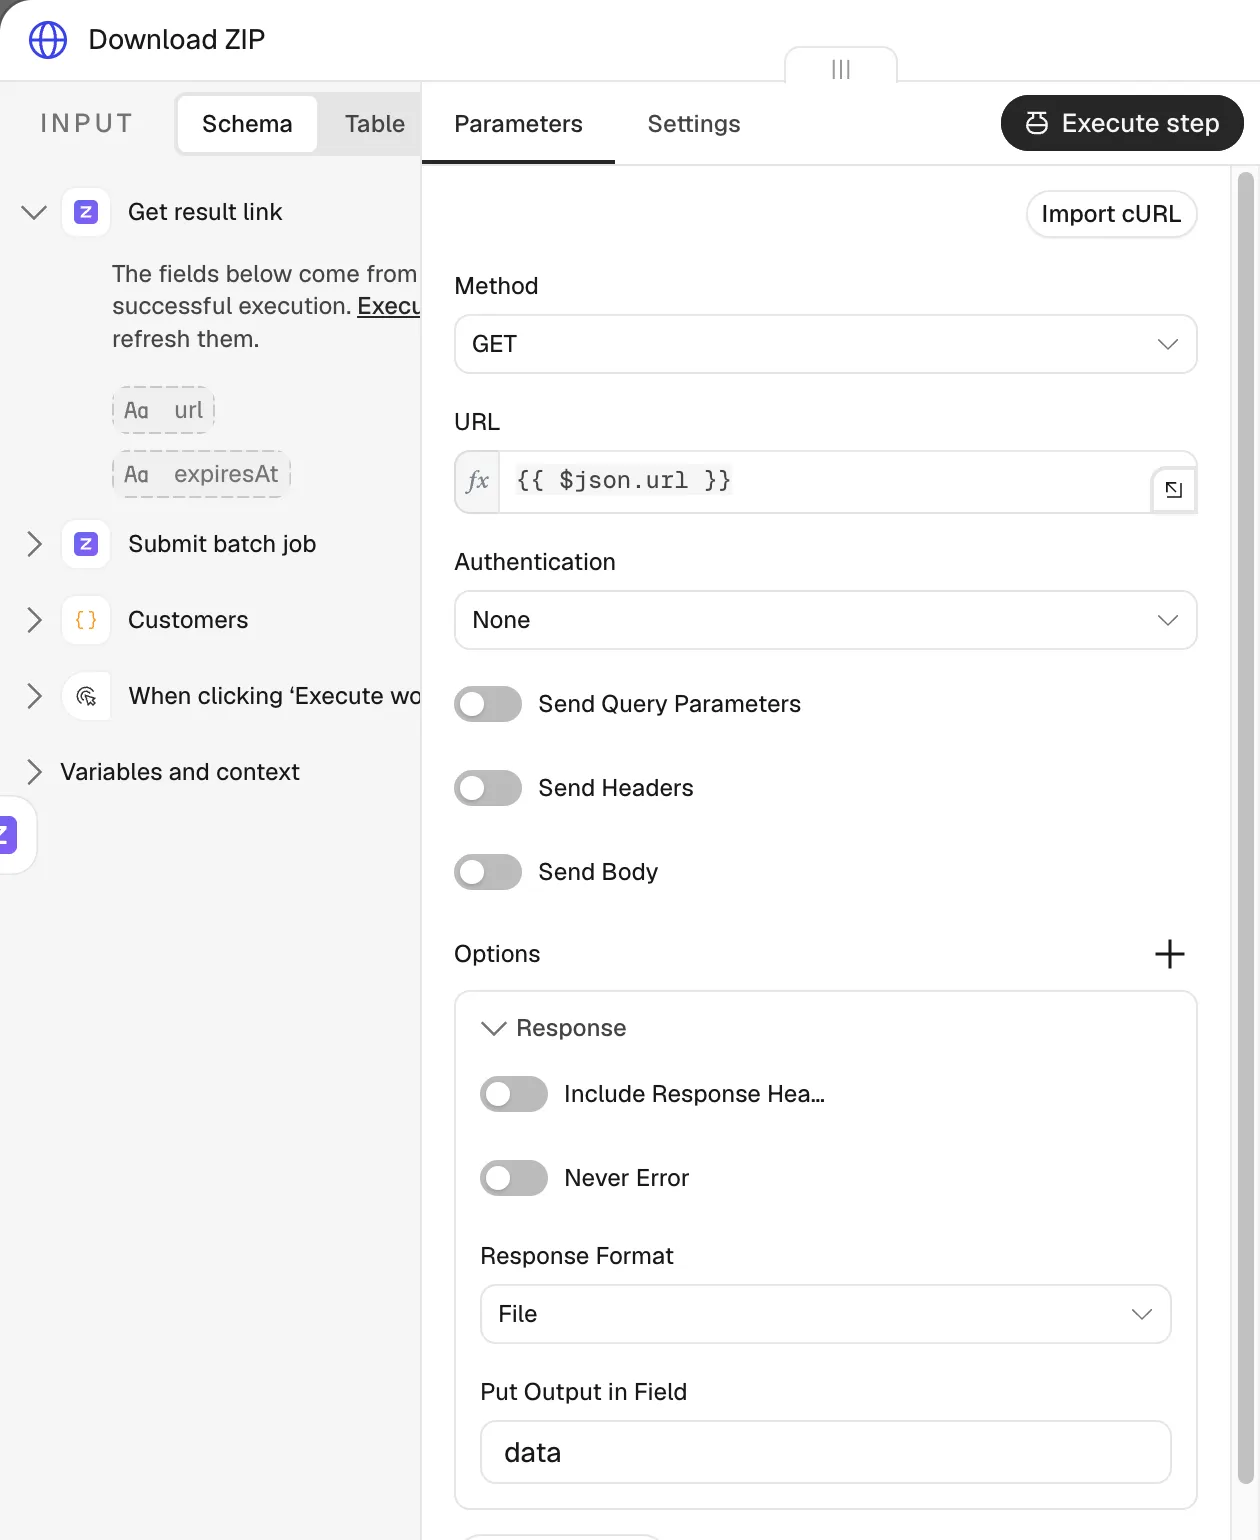
Then unzip it with a Compression node (Decompress), which puts every image of the archive on one item, or send the archive on with an upload node such as S3 or Google Drive. The Compression node holds the whole archive and the unzipped files in memory, about twice the archive size, so keep each batch job small enough for your n8n’s memory (640 MiB on small n8n Cloud plans), for example with a Loop Over Items node before Submit. To handle each image on its own, Template → Generate per item avoids the archive altogether.
A job that has not finished yet fails with “Batch job FAILED or CANCELLED fails with “Batch job
Batch Job → Get outputs a job’s status and counts, Get Items outputs one item per row (its index, status and error), and Cancel stops a running job, refunds the rows it has not rendered, and outputs the job with refundedRows.
Submit needs an API key with the render and templates:read scopes; Get, Get Items, Get Result and Cancel need render.
Call other Zandovi endpoints
Section titled “Call other Zandovi endpoints”For a Zandovi API endpoint the node does not cover, add an HTTP Request node, set Authentication to Predefined Credential Type, choose Zandovi API and select your credential. The key is attached for you, so you never paste it into the request. Use the full URL, for example https://app.zandovi.com/api/v1/account.
Retries and errors
Section titled “Retries and errors”The node processes input items one at a time, in order: the request for an item starts only after the previous item’s request has finished, retries included. Every request times out after 120 seconds, and a timeout fails with “Zandovi did not respond within 120 s”.
The node retries on its own in two cases:
- Rate limit. When Zandovi answers
429and asks to wait 30 seconds or less, the node waits that long and sends the same request again, at most 3 times. When the fourth attempt is also limited, or the wait asked for is longer, the item fails with “Zandovi rate limit reached; retry later”. - A render already in progress. When an earlier attempt with the same Idempotency Key is still rendering, the node waits 2 seconds and tries again, at most 5 times, then fails with “A previous attempt of this render is still running”.
A used-up monthly quota is never waited on: the item fails at once with “Monthly render quota used up; it resets on
These retries run inside one attempt of the node. If you also turn on n8n’s Retry On Fail setting, both apply, and a retried render still sends the same Idempotency Key, so it is not charged twice (with the AI Agent exception described under Render a template).
Other errors fail the item with a message that says what to fix:
| Zandovi answers | The item fails with |
|---|---|
400 | The reason, plus each invalid field or variable |
401 | ”Invalid or revoked API key. Create one under Settings → API Keys.” |
402 | The plan limit that was hit |
403, missing scope | ”This API key lacks the <scope> scope needed for |
404 | ”<Template / Batch job / Image> not found, or not visible to this API key’s account” |
422, reused key | ”This Idempotency Key was already used with different inputs” |
a redirect (3xx) | “Zandovi answered with a redirect, which the node does not follow; check the Base URL of the credential” |
5xx | ”Zandovi service error ( |
With Continue On Fail on, a failing item produces an output item { "error": "<message>", "status": <HTTP status>, "code": "<Zandovi error code>" } paired to its input, and the node goes on with the next item. With it off, the node stops at the first failing item and reports that item’s index. Your API key never appears in output data or error messages: a network failure is reported by its error code only, and the key is removed from any message Zandovi sends back.